


Do you have that old piece of clothing that's looking a bit stale? Do you need a different colored jacket but don't have the money to waste on a new one? Well you can easily make an old piece of clothing look completely different! I'll show you how, using Rit Dye.

Materials
- Article of clothing you want to dye
- Rit dye
- Bucket you don't care for
- Large pot (for boiling)
Total cost estimate: $2
(based off what I had to buy)
Project Duration Estimate: 2 hours
Everything in this tutorial can be found at your local arts and crafts stores and/or large multipurpose stores.
WARNINGS:
Rit Dye can cause irritation if contact with eyes is made. When handling the dye, wear gloves or refrain from touching eyes while your hands are/could be contaminated. Always wash your hands after handling.
We will also be boiling water, so make sure you have some oven mitts for when we transfer the hot water from the pot to the bucket.
Always make sure you read through the entire process before beginning to avoid mistakes and get a general idea of how the project will progress.
Now let's make get started:

Step 1: Boil a large amount of water
There are many ways to use Rit dye, but for this tutorial, since we have a very large article of clothing (or assuming that you do), we're going to be using a separate bucket to soak it in. For the first step, we need to boil water. The amount of water depends on the article of clothing you're trying to dye. For small items, like gloves or other accessories, you may only want to use half a packet (1/4 a bottle, if using the liquid version) and enough water to suspend the object yet cover it completely. For my jeans, I used a large pot that I assume could carry around 8-10 cups and an entire packet (or half a bottle for the liquid version) of Rit Dye. For now, all we have to worry about is bringing our water to a boil. It may take a while, depending on how much water you have. It took my amount of water about 15 minutes to lightly boil.

Step 2: Prep your article of clothing
While you're waiting for your water to come to a boil, you can begin to soak the clothing piece you're going to dye. If you're wondering whether or not you can dye your particular clothing piece, Rit Dye works on almost anything. It can dye plastic, vinyl, leather, faux leather, felt, denum, cotton, webbing, muslin, feathers, and much much more. Either way, to prep the clothing, all you have to do is completely soak it in warm water. Crumple the fabric together and then stretch it apart, making sure the entire piece gets wet. Once it's wet, wring it out lightly and set it aside.
Another step you may need to take depends on what you're dying. If you're going to dye from a lighter color to a darker one, you may not need this step. For example, if you're going from a light purple to a dark purple, you will not need to pre-bleach or color-treat your fabric. If you're crossing colors or going from dark to light, you will need to purchase the Rit Color Bleach. I don't remember what it's called exactly, but the process to use it will be the same as using the normal Rit Colors, but you will need to do it before you apply the colors.

Step 3: Dissolve the Rit Dye
Once your water has reached a light boil, it's hot enough to take off the stove and transfer into the bucket. Carefully transfer the water, since it is obviously very hot. Once you've done so, pour whatever amount of dye into the bucket and mix it generously for a couple of minutes, making sure that the salt/liquid completely mixes into the water. It's important that you mix the dye into the bath before you put the clothing so that the clothes dye evenly. If you pour the dye into the mixture while the clothes are inside, there's a chance that you will get a blotchy coloring rather than an even coat of color.

Step 4: Add your clothing
Aaand finally, put those suckers in the bath. Don't throw them in or anything, calm down. Gently set the clothing into the bucket and slowly poke it underwater little by little with either a stirring rod of some sort (I used a random PVC pipe), or your hands. If you use your hands, you should wear gloves, as the dye will probably soak into your skin (also the water is still pretty damn hot). While you're pressing the fabric down into the bottom of the bucket, bubbles will tend to escape from inside the clothing and may cause some splashing. Make sure you do this step inside a sink, tub, or outside. Somewhere your parents won't throw a fit if you get dye on the floor. Once you've got it all underwater, let the clothing soak for about 5 minutes and then come back to stir the clothing to a different position. Continue stirring the clothing in 5-10 minute intervals, changing the position and making sure all crevices or folds in the clothing get opened and soaked. The instructions on the Rit Dye specify to soak the clothing for 30 minutes to an hour, however, I let it soak for about 2 hours total. I'm a bit paranoid, though, so you can follow the packet if you wish.

Step 5: Rinsing the article
After an hour or two (however long you decided to wait), find an area where you can dump out the excess water. If you're outside, you can probably dump it in the crass, if you're inside, you can try to put it down the drain, but it will stain if it's not rinsed off immediately. Where-ever you decide to rinse it off, simply run water over the piece until the water that drips off it is clear and not colored. This WILL take a while, so be patient. What I would recommend is taking it outside and hosing it down or leaving the clothing in the bucket, filling it with water and replacing the water as it becomes black. Either way you decide, simply make sure it is as rinsed as possible.

Step 6: Air dry or Dryer
Once your piece is rinsed, you have the choice of placing it in the dryer or letting it hang dry. Putting the clothing in the dryer will prevent it from wrinkling up, but clothing such as leather, and faux leather should be left to hang dry. Also, if you ARE working with faux leather or leather, hang the clothing to dry, and pat it down with a damp sponge or cloth every 15 minutes or so. Sometimes, a film of greasy looking liquid will surface on the faux leather but it can simply be whiped off. If not, anything you wouldn't put in the dryer should not be put in the dryer for this step.
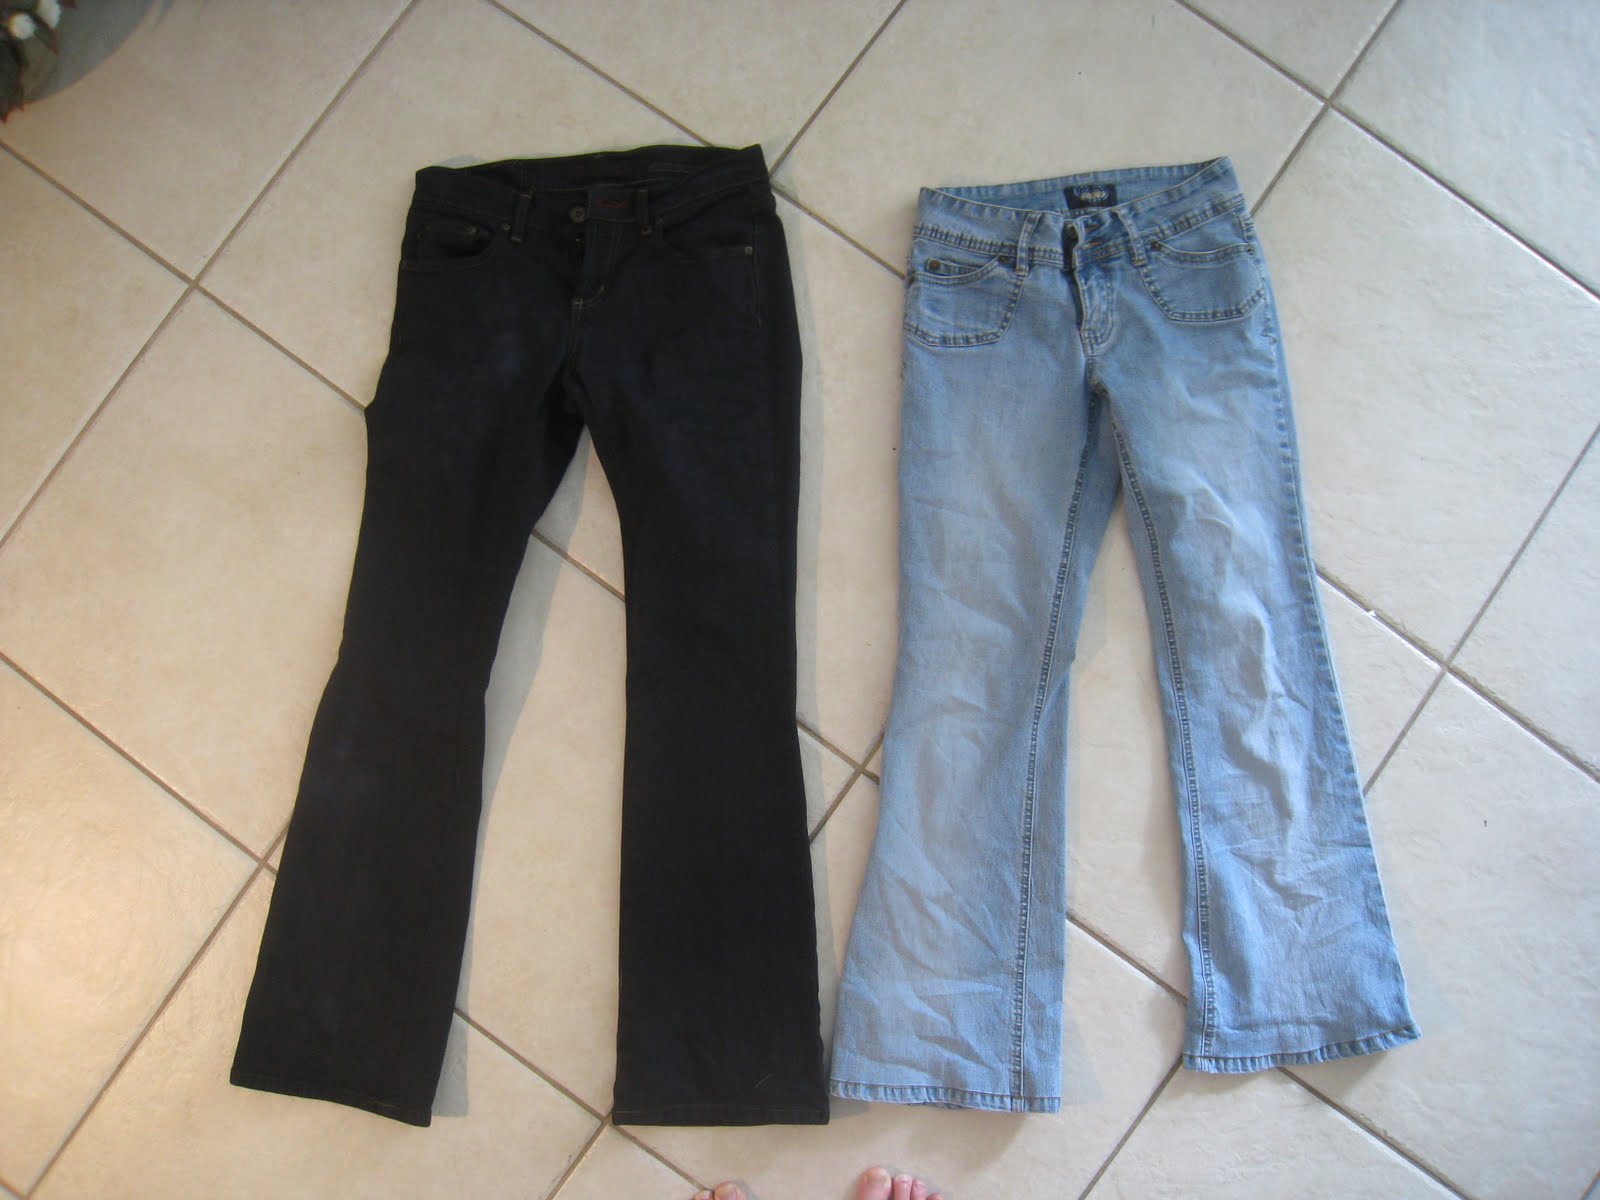
And there you have it!
A cheap and easy way to spice up an old piece of clothing or just change up that one piece that isn't quite to your liking. Hope this helped!

For more information on purchasing jewelery and other props in my tutorials, requesting a custom item, or an idea for a new tutorial, feel free to email me at Kanti-Kane@hotmail.com (:
Thank you so much! I bought a faux bomber jacket for a cosplay and the colour is too purple...I didn't want to send it all the way back to the UK so I'm going to try to dye it...thanks for the advice...I'll let you know how it goes :)
ReplyDelete